
This weekend, our group participated in a fabulous Norse themed event. Our main themes of the weekend were early period cooking and wood turning. We had two cooking fires going, an impromptu totally non-period bread oven experiment and a pole lathe, with a very patient wood turner who spent oodles of time showing people how to use the pole lathe and letting a myriad of kidlets have a turn using foot power to turn the lathe.

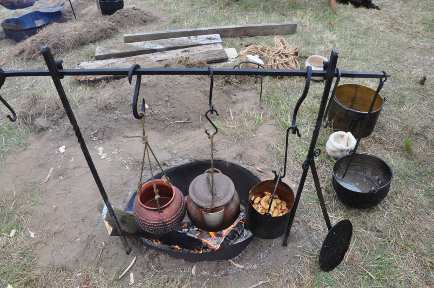
We had pots one one fire for boiling water, heating cider, cooking veggies, making stew and frying sausages. The second fire started off with a dye pot, but reality is that I can either dye or make bread and never had enough time for both. Quickly, the dye pot was removed and we kept the flat breads cooking and the spit soon held a huge roast beef for our dinner.

The bread oven was definitely a modern construct. The land owners had hoped to make a real cob oven, but didn't have the time to get it done this summer. Instead, they found all these materials for us to make a temporary oven with, which we had to play with. This type of oven uses residual heat to cook with. It took over 4 hours to get the oven hot enough. We then scraped out the fire, cleaned off the ash and promptly stuck a loaf of bread dough in, forgetting the "soak" period or the timing in which the oven temperatures get to even out. The first loaf burnt to a crisp on the outside, but the inside was devoured quite quickly by people waiting to see our results. The next 3 loaves cooked nicely, taking slightly more time than each previous loaf. There wasn't enough heat to do multiple continuous baking like a true cob oven would hold, but enough for 3 loaves of bread was a pretty exciting result.

It was a very cool experiment. We learned a lot from this and will be able to adjust our own cob oven in the future. It was suggested by one member that we should have two doors. None of the period examples I've seen have two doors and it is pretty obvious that we can't afford to lose the amount of heat that having two doors would entail. We lost enough just opening the one door and removing a loaf. Another member suggested a long and fairly tall prototype, which I think won't work as well either. This experiment gave rise to lower and rounder ideas, which is what we see in the outdoor bread ovens still in use today.

 This weekend, our group participated in a fabulous Norse themed event. Our main themes of the weekend were early period cooking and wood turning. We had two cooking fires going, an impromptu totally non-period bread oven experiment and a pole lathe, with a very patient wood turner who spent oodles of time showing people how to use the pole lathe and letting a myriad of kidlets have a turn using foot power to turn the lathe.
 We had pots one one fire for boiling water, heating cider, cooking veggies, making stew and frying sausages. The second fire started off with a dye pot, but reality is that I can either dye or make bread and never had enough time for both. Quickly, the dye pot was removed and we kept the flat breads cooking and the spit soon held a huge roast beef for our dinner.
 The bread oven was definitely a modern construct. The land owners had hoped to make a real cob oven, but didn't have the time to get it done this summer. Instead, they found all these materials for us to make a temporary oven with, which we had to play with. This type of oven uses residual heat to cook with. It took over 4 hours to get the oven hot enough. We then scraped out the fire, cleaned off the ash and promptly stuck a loaf of bread dough in, forgetting the "soak" period or the timing in which the oven temperatures get to even out. The first loaf burnt to a crisp on the outside, but the inside was devoured quite quickly by people waiting to see our results. The next 3 loaves cooked nicely, taking slightly more time than each previous loaf. There wasn't enough heat to do multiple continuous baking like a true cob oven would hold, but enough for 3 loaves of bread was a pretty exciting result.
 It was a very cool experiment. We learned a lot from this and will be able to adjust our own cob oven in the future. It was suggested by one member that we should have two doors. None of the period examples I've seen have two doors and it is pretty obvious that we can't afford to lose the amount of heat that having two doors would entail. We lost enough just opening the one door and removing a loaf. Another member suggested a long and fairly tall prototype, which I think won't work as well either. This experiment gave rise to lower and rounder ideas, which is what we see in the outdoor bread ovens still in use today.


